Spindles
March 10 2014
While it can be agreed that the 85' rear suspension is not as ideal as the 88' suspension in geometry or components, I did make the decision to stick with this rear suspension arrangement for several reasons. Firstly, I already had a set of near mint rear spindles that I wanted to reuse for this project. Secondly and probably most important to me was the fact the the 85' rear suspension is a much simpler arrangement with just the strut and lower control arm so making modifications to suit my wider chassis and lower stance seemed to be a much easier task and a much lower risk of buggering up the suspension geometry and performance characteristics all together.
So I proceed ahead with my new suspension based on the stock rear spindles that came with the car. For my purposes, the stock spindles do require a slight modification for use....... actually two modifications.
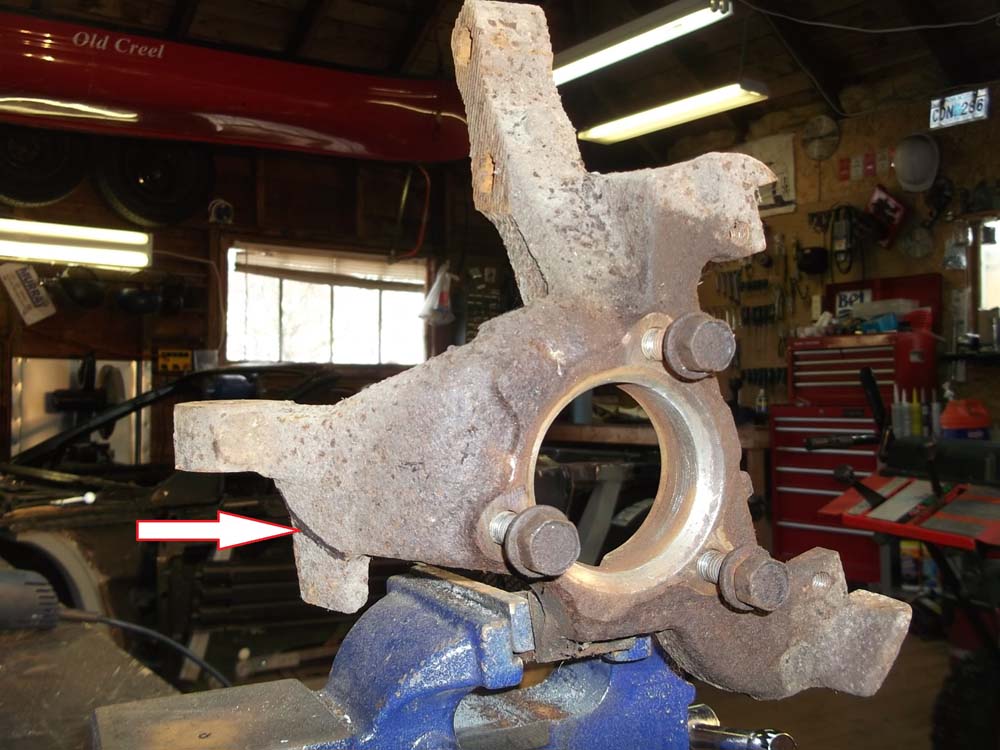
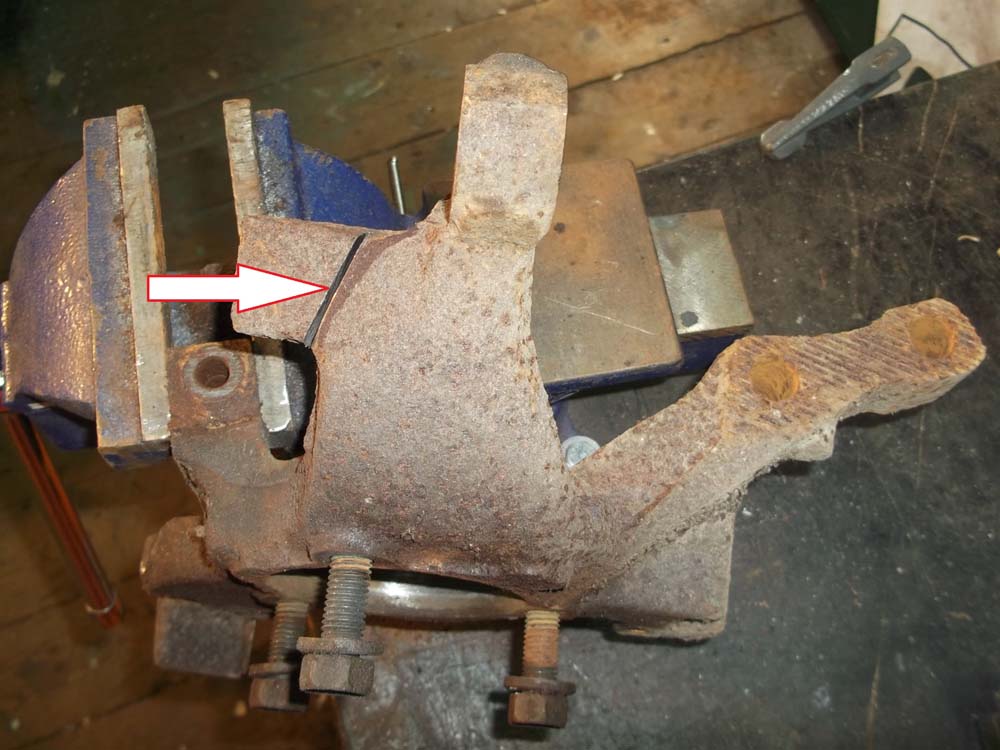
The first issue is in reference to the steering stop. Remember that the rear suspension of the Fiero is actually a GM front suspension that was turned 180 degrees and use for the mid engine / rear wheel drive of the Fiero. So the spindle had a steering stop included as part of the casting. For my arrangement, this steering stop is little more than a vestigial tail now and worthy of removal. Here is the spindle and the arrow points to the steering stop. The second photo shows the "tail" being cut off with a zip wheel. The third photo shows the cut edge blended smooth like the rest of the casting. Later on when I further cover the design of the new suspension arrangement, it will be more obvious as to why this little piece needed to be removed.
While it can be agreed that the 85' rear suspension is not as ideal as the 88' suspension in geometry or components, I did make the decision to stick with this rear suspension arrangement for several reasons. Firstly, I already had a set of near mint rear spindles that I wanted to reuse for this project. Secondly and probably most important to me was the fact the the 85' rear suspension is a much simpler arrangement with just the strut and lower control arm so making modifications to suit my wider chassis and lower stance seemed to be a much easier task and a much lower risk of buggering up the suspension geometry and performance characteristics all together.
So I proceed ahead with my new suspension based on the stock rear spindles that came with the car. For my purposes, the stock spindles do require a slight modification for use....... actually two modifications.
The first issue is in reference to the steering stop. Remember that the rear suspension of the Fiero is actually a GM front suspension that was turned 180 degrees and use for the mid engine / rear wheel drive of the Fiero. So the spindle had a steering stop included as part of the casting. For my arrangement, this steering stop is little more than a vestigial tail now and worthy of removal. Here is the spindle and the arrow points to the steering stop. The second photo shows the "tail" being cut off with a zip wheel. The third photo shows the cut edge blended smooth like the rest of the casting. Later on when I further cover the design of the new suspension arrangement, it will be more obvious as to why this little piece needed to be removed.
|
|
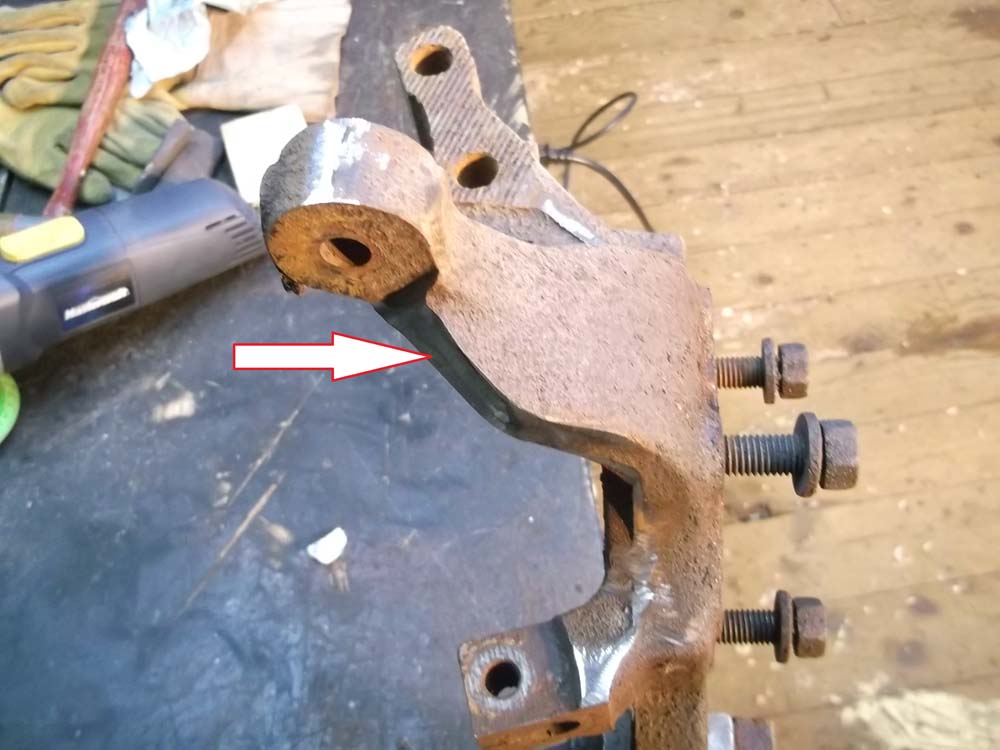
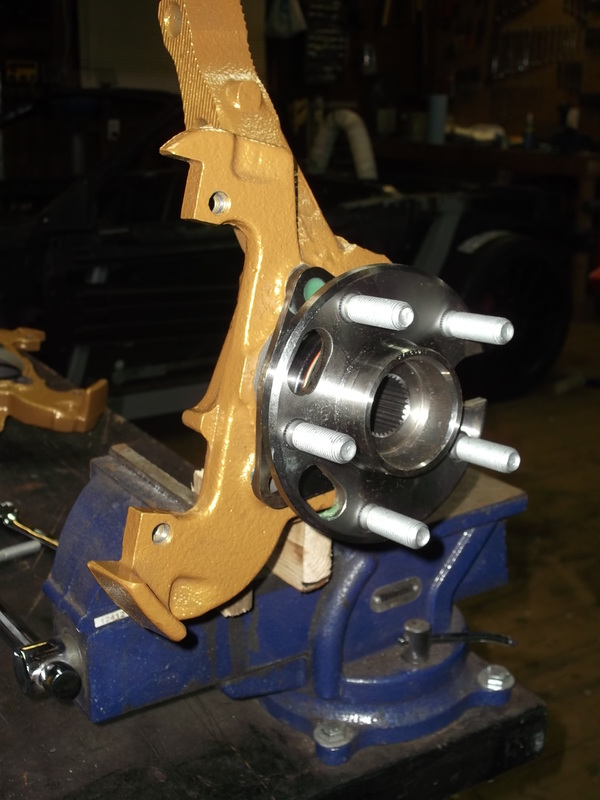
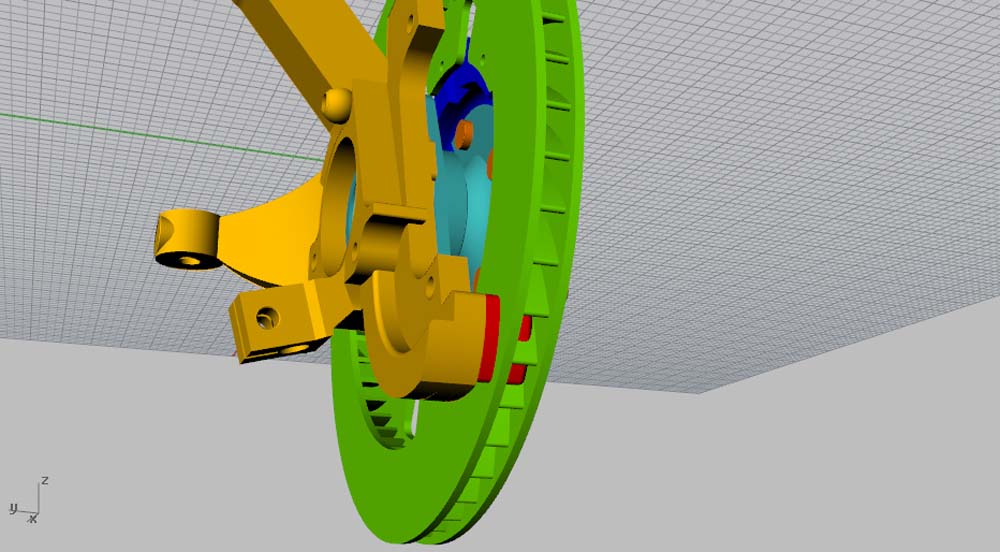
The second issue with the stock spindle is related to the new 13" brake rotors I selected. earlier, I noted that the new rotor had a small interference issue with the spindle due to the much larger diameter of the new rotor. Again, like the previous steering stop that was removed, the spindle was cast with a tab which was used as a support for the Fiero brake caliper. The point of interest is colored red for accentuation. Obviously it will have to come off so that the new rotors will fit. As well, since the new rotors are so much larger in diameter, I will have to design and fabricate an offset bracket for the new calipers.

|
|
March 16 2014
Here is a photo of the spindle showing the second offending tail to be removed. You'll also notice that I had already had the spindle cleaned up and powder coated gold nugget like the roll over hoops prior to discovering this material to be removed. As often happens with a project like this, you take two steps forward only to take one step backward afterwards. Still, the spindle looks pretty good with a new wheel bearing installed.
Here is a photo of the spindle showing the second offending tail to be removed. You'll also notice that I had already had the spindle cleaned up and powder coated gold nugget like the roll over hoops prior to discovering this material to be removed. As often happens with a project like this, you take two steps forward only to take one step backward afterwards. Still, the spindle looks pretty good with a new wheel bearing installed.